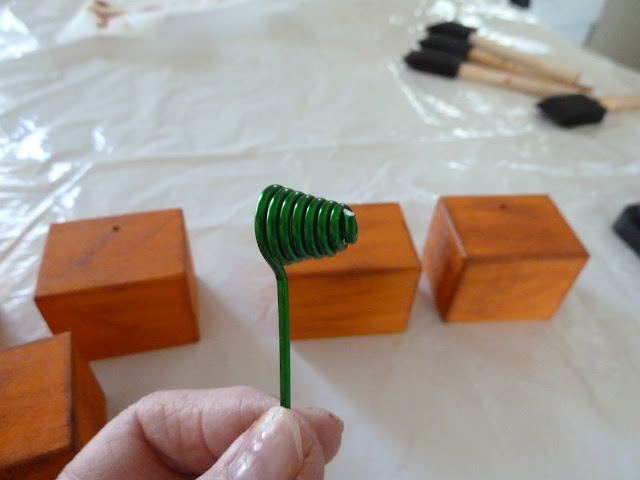
This is a display in a favorite woodshop that I like to snoop through now and then. These blocks were the inspiration for the version I put up here a couple of days ago. Several of you wanted a tutorial. There is really not a lot to tell. I purchased the wood leaves, and this craft wire at the wood shop. If you cannot find wood leaves...there are beautiful foil leaves available in pkgs at any craft store that has scrapbook stuff. Notice the wire photo holders here. They are all different and not fancy at all. This wire is thick and hard to curl. Use a needle nose plier to curl that end. For the rest of it you can just wrap it around something lke the handle of a wooden spoon. You will need to push it together or pull it apart so a photo or recipe card etc, can be held snuggly between the wires. A thinner craft wire would work too and it would be easier to work with. They glued the wire to the back of the block. Apparantly it will work, but it is far better to drill a hole in the block at least 1/2 inch deep and a smidgen bigger than the wire, to allow space for glue. The wood shop sold 2" blocks for $1.25 each, which was not within my budget for the number of girls I have in the class. So I went to Lowe's and bought a 1 1/4 x 1 1/4 wood stick that was 36" long, and cut it into 1 1/2" lengths. So they were not perfectly square.

So now you cover your workplace with an old plastic table cloth, or newspapers. Put on your grandma's old shirt....and paint the blocks with orange acryllic paint
 When the paint is dry, use a dry foam brush to brush some ink on the edges and add a few streaks on the sides and top lke a texture. If you have not already drilled a snall hole in the block, you can do it now. Make it big ebough for the wire holder to go in easily. You can see the placement for the hole on the next photo.
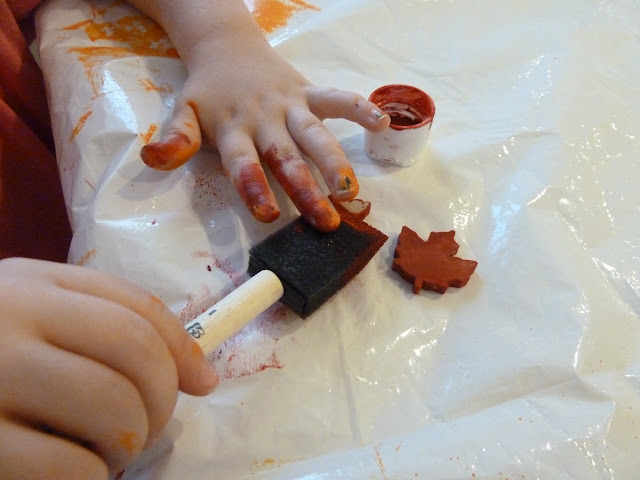
 Next, paint the leaves...edges first, then the top. Paint them red. Use a little orange paint to make them look like they are autumn leaves. Put a tiny bit of orange paint on the little edge of the foam brush and gently make the lines on the leaves.
Here is what my wires looked like because I asked my husband to make them for me and he made them fancy. He sanded down a wooden dowel like a pencil tip and wrapped the wire around it to get this graduated coil effect.
 This is the glue that we used to glue jewels on the leaves, and to glue the wire into the block. It dries pretty fast and holds great.
The wire tail on the holder is only about 2" at the most. Dip the end in the glue and
stick it in the hole...some will pop out the top, you can push it back in the hold and re-insert the wire. Wipe any excess off with your finger or a cotton swab. Let it dry.
 I used a hot glue gun to glue the leaves to the blocks, and to glue the little decorations on top of the block. See photo from a couple of days ago. Cut a 12" length of 1/4" wide craft ribbon and tie it tightly around the top of the block. Tie a knot. Trim the ends to about 1/2 " I found these little berries and pine cones to cut off and glue to the blocks . I was looking for tiny autumn leaves but couldn 't find any.
 Rory says ....if you get paint on your nail polish, it will not come off, and so you get to redo your nails. This is true!

What a neat photo display idea, thanks for the 'how to'.
ReplyDeleteThanks Rory for the tip about the nails...too cute!
Thanks so much for showing us how to do this. I can't wait to try it. I just started using Pinterest and Pinned your tutorial because I bet others will enjoy it too. And, I must say, that Rory is one smart Princess!
ReplyDeleteThanks for the tutorial! What a neat craft.
ReplyDeleteVery cute! Love seeing your tutorial photos! Rory seems like a great helper!
ReplyDeleteThank you for posting the steps to make these! Looks like a good project for a cold, rainy day like today. Too bad I don't have all the materials to do it today. :) These would make great grandparent gifts from the kids.
ReplyDelete